What is a solar panel snow guard?
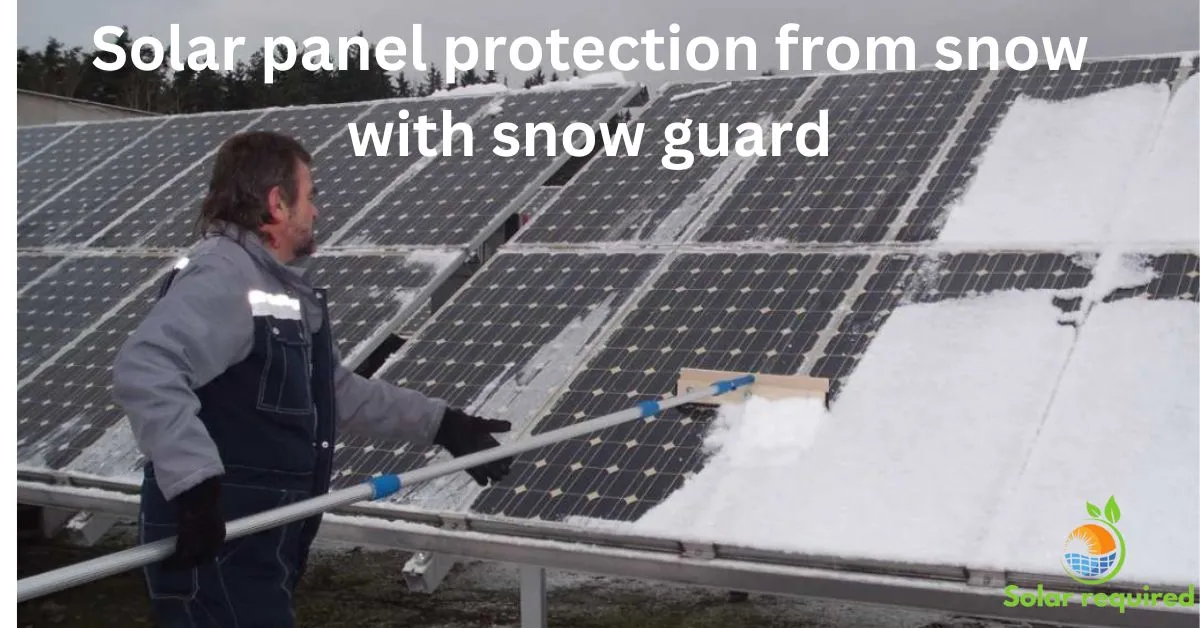
A snow guard is an essential item to stop snow and ice from building up on your solar panels. These guards serve as a barrier, as their name implies. They protect your solar panels from the weight and insulating effects of snow. You can protect your solar panel investment. You can guarantee this by installing a good snow guard system. It ensures they make the most energy in the winter.
Snow blocks the sun. It can greatly cut the panels’ power. Also, the panels’ mounts or the panels themselves may sustain damage. Rain can damage the solar panel, so how to ensure the safety of the solar panel. This can happen from the weight of heavy snow. Snow guards for solar panels offer a solution to this problem. They let you maximize your solar system’s power, even in the coldest winter months.
These guards come in various designs and materials. Each is tailored to meet specific requirements. These requirements depend on climate, roof slope, and panel layout. Add a solar panel snow guard to your solar panel installation. It will give you peace of mind. Your investment will be safe from the harm of winter weather.
People also read: The Role of Solar Panels in Decreasing Flooding Issues in Miami.
snow guards types & costs
Solar snow guards come in several types. Each type has its features and benefits. Understanding the options can help you make an informed decision. You can then choose the best guard for your solar panel system. Here are some common types of solar snow guards.
Knowing the potential costs can help you budget. It can also help you make an informed decision. Here are some things to consider before purchasing a solar panel.
Types
- 1. Roof Rakes or Roof Brushes
- 2. Snow fences or snow guards
- 3. Heated Cable Systems
- 4. Adjustable Tilt Systems
- 5. Framed Panels with Integrated Snow Guards
1. Roof Rakes or Roof Brushes:
It would help if you used these long-handled tools to physically clear snow by hand. Use them to clear snow from your solar panels and roof. Roof rakes and brushes can help with light to moderate snowfall. But, they are not a permanent fix.
Cost: These hand tools are usually the cheapest option. They cost from $30 to $100 or more, depending on size and quality.
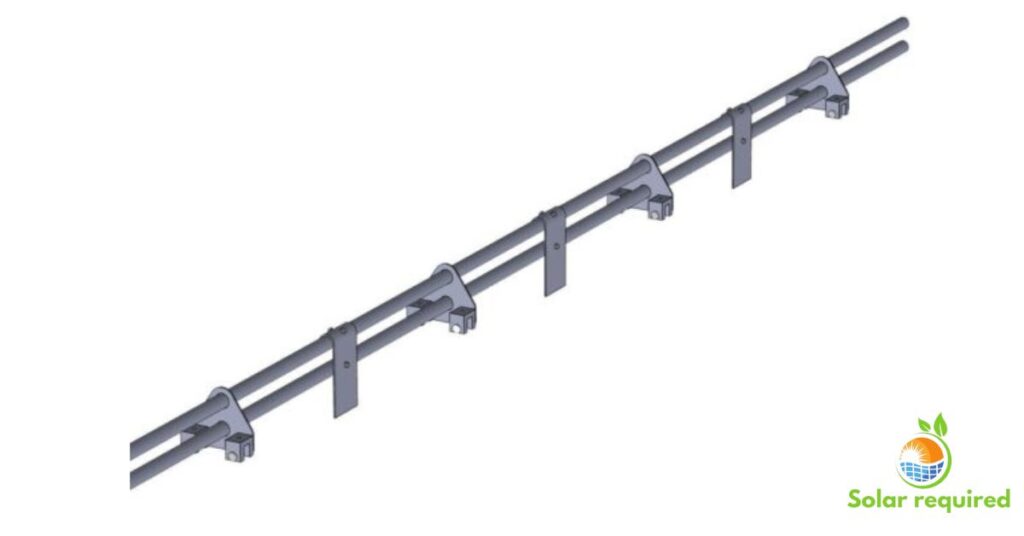
2. Snow fences or snow guards:
These real barriers are placed around your roof’s or solar panels’ perimeter. They keep snow from building up on the panels and slipping off. You can make snow fences using materials such as rubber, plastic, and metal.
Cost: This depends on the material, size, and installation needs. Better metal solutions can cost $100 to $400 or more per panel. Basic plastic or rubber guards may cost $50 to $200.
3. Heated Cable Systems:
These systems include the installation of heating cables under the solar panels or along their margins. They prevent snow from piling up and melting. This ensures the panels work well.
Cost: The cost depends on the size of your solar panel array and the difficulty of the installation. Heated cable systems can cost $500 to $2,000 or more. They are generally one of the most expensive solutions.
4. Framed Panels with Integrated Snow Guards:
Some solar panel manufacturers offer framed panels with built-in snow guards. These panels feature raised edges or lips that help shed snow and prevent accumulation.
This may cost more upfront than standard panels. However, it can avoid the need for snow guard installations and provide a long-term solution.
5. Adjustable Tilt Systems:
These systems allow you to tilt your solar panels. This makes it easier for snow to slide off. They can be manual or automated depending on your preference and budget.
Each type of solar panel snow guard has its pros and cons. The best choice depends on factors like your location, climate, roof design, and budget. You must consult a solar professional to find the best option for your needs. They can be an installer ora manufacturer. Before installing solar panels, here are some things you should know.
Installation process of snow guard
Installing a snow guard is crucial. It protects your solar system from the harm of snow. The installation process may vary. It depends on the type of snow guard and your solar panel array’s specific requirements. But people usually follow some general steps. Here’s an overview of the installation process for a panel snow guard:
Related: Solar Panel Shade Structure: Step-by-Step Guide
1. Site Assessment and Planning:
Before starting any installation work, the team conducts a site assessment. It evaluates factors such as roof angle, panel layout, and local weather. This assessment helps pick the best snow guard type. It also finds the best place to put it for the most effectiveness.

2. Preparation and Safety Measures:
We take proper safety precautions to ensure that we carry out the installation process safely. This may include securing the work area. You should use the right protective gear (PPE) and follow all safety rules.
3. Panel Removal (if necessary):
You may need to briefly remove some or all of the solar panels. This depends on the type of snow guard being installed. This step ensures easy access to the mounting hardware. It also gives access to the roof for proper installation.
4. Mounting Hardware Installation:
Carefully install the mounting hardware for the snow guard system. According to the manufacturer’s instructions, do it. This may involve drilling holes. It also means securing brackets or attaching rails to the roof or panels.
5. Snow Guard Installation:
After placing the mounting hardware, the installers place the actual snow guard components. To ensure a snug fit, you may need to attach guards, a fence, or hot cable systems to the hardware.
6. Electrical Connections (if applicable):
We have installed the needed wiring and control parts. They connect to the right power sources. These systems need electrical connections like heated cable systems.
7. Panel Reinstallation (if Removed):
During installation workers carefully positioned the solar panels. They made sure to align them and fasten them to the mounting hardware correctly.
Common installation mistakes to avoid
The first step is vital. It will safeguard your investment and ensure maximum winter energy output. You need to install a snow guard for your solar panels. However, even a small error during installation might reduce the snow guard’s effectiveness. It might even require costly repairs or replacements.
To ensure a good installation, you must spot common errors. Then you must take steps to prevent them. When installing a solar panel snow guard, be sure to avoid these common installation errors:
1. Improper Site Assessment:
Failing to conduct a site assessment can result in choosing or placing the wrong snow guard. To make sure the snow guard works well it must be fitted correctly. Consider factors such as panel layout, roof slope and local weather.
2. Ignoring Manufacturer Instructions:
The manufacturer provides detailed installation instructions with every solar panel snow guard device. Ignoring these instructions may lead to a bad installation. This could hurt its efficacy and maybe violate warranties.
3. Inadequate Safety Measures:
Installing a solar panel snow guard often requires using large machines. You also have to work at heights. Installers and property may be at risk if safety procedures are not taken. These include securing the work area, wearing PPE, and following safety regulations.
Keep in mind: buying a good solar panel snow guard can protect your system. It will ensure you produce the most energy possible in winter. You may reap the long-term benefits of a well-built snow guard system. You can do this by avoiding these common installation errors.

